Custom OS Template (Windows)
An administrator within an organisation can craft a custom OS template to be used for launching remote desktops. This also provides a way to activate your own operating system licence.
Following these steps correctly is crucial for building a successful image. Proceed with care.
Important:
About Disk Partition
1. A customised template needs either a single disk partition, or two: one as the EFI/Boot partition and the other for system and data.
2. LVM partitions are unsupported — do not use them.
3. Using an incorrect partition layout will break the automatic disk resizing and machine naming features.
Windows
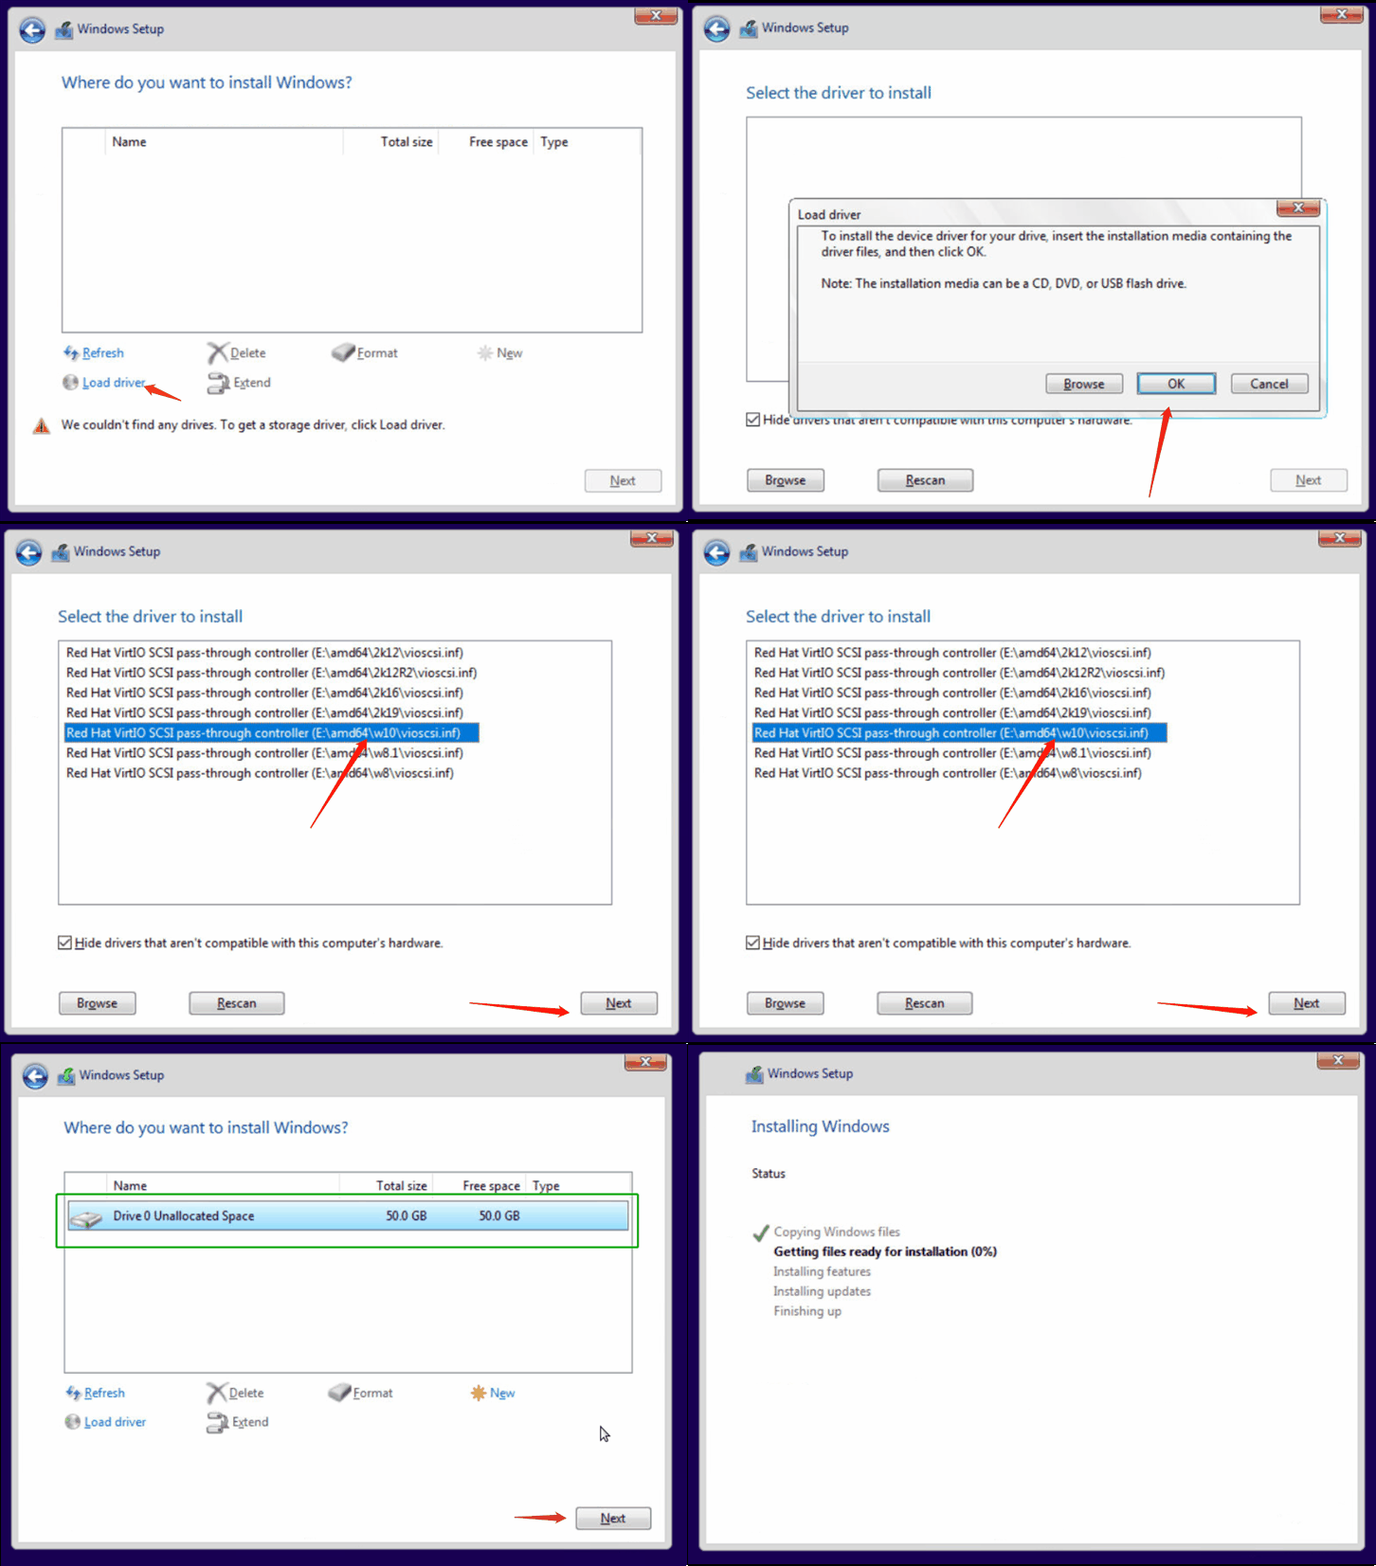
1. Install "Red Hat VirtIO SCSI pass-through controller
When prompted with "Where do you want to install Windows?", click "Load drivers" and then select the appropriate driver. Once done, the storage drive will appear.
2. Initial Setup
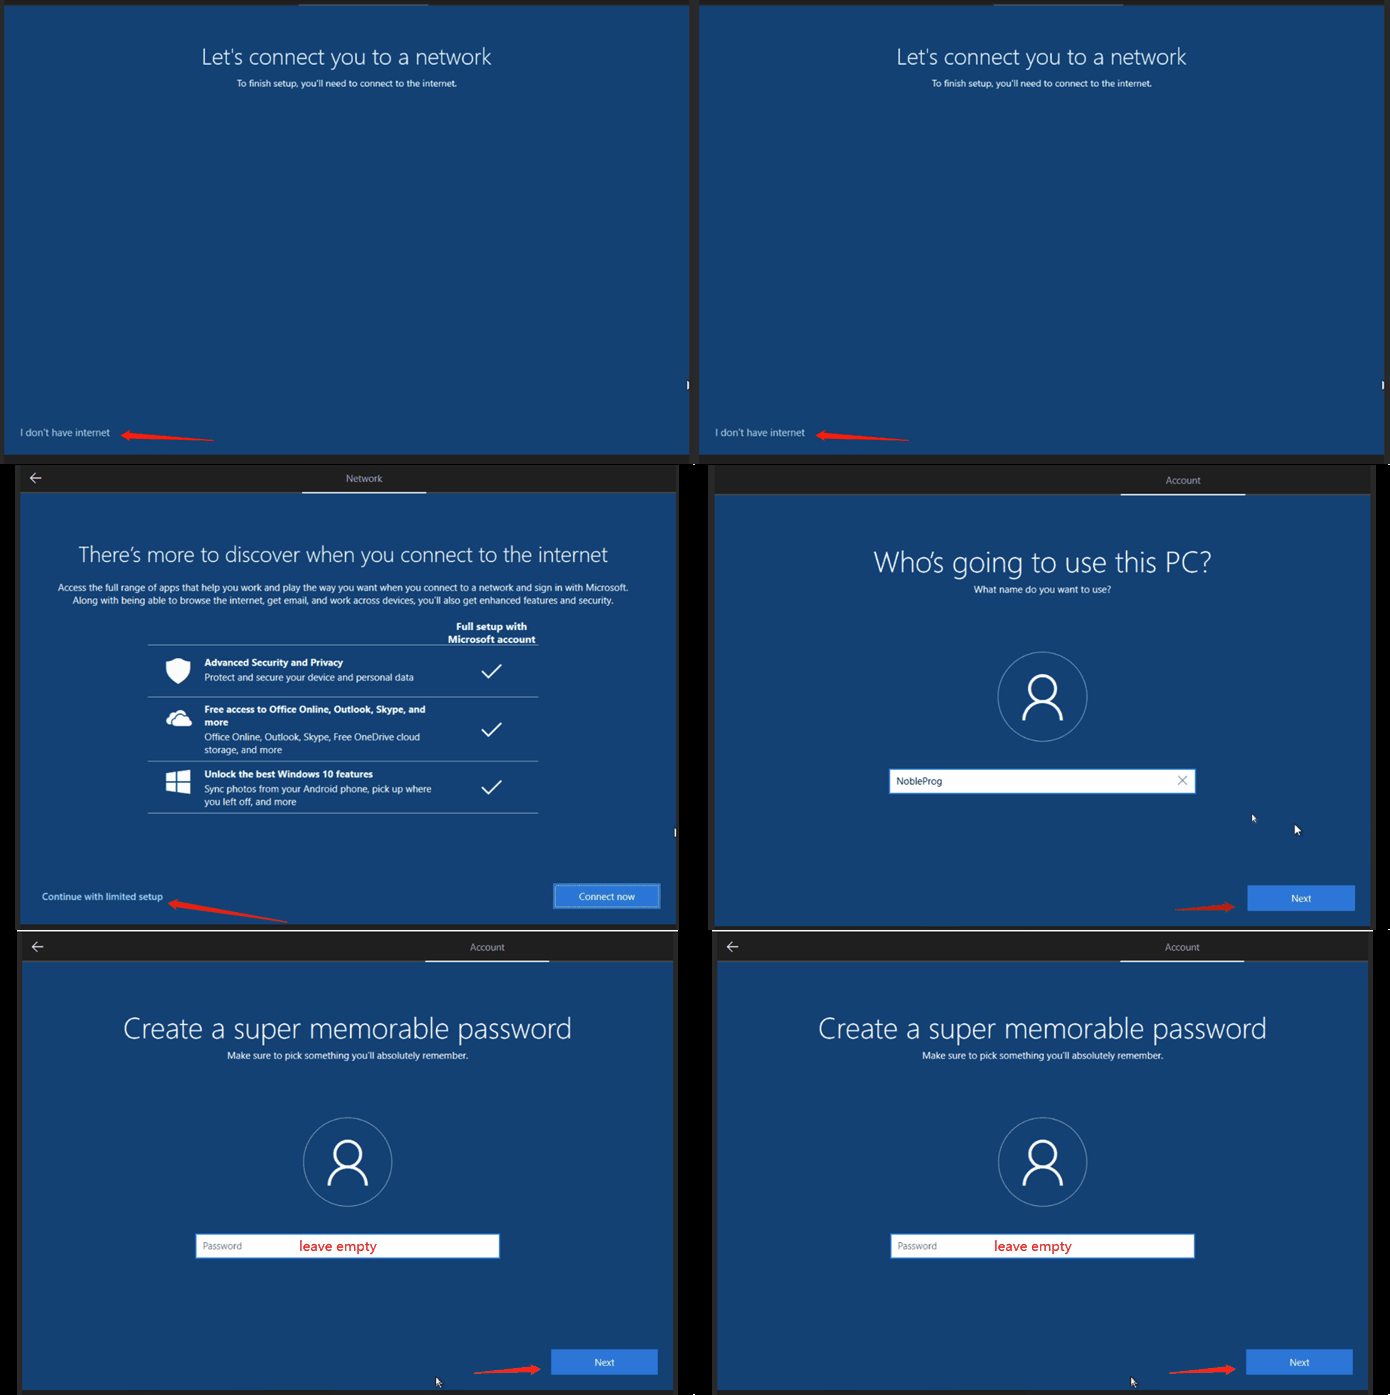
Click I don't have internet when you see "Let's connect you to a network".
Click Continue with limited setup when the "There's more to discover..." screen appears.
Choose any username and leave the password blank.
3. Install Virtio-win drivers and guest agents
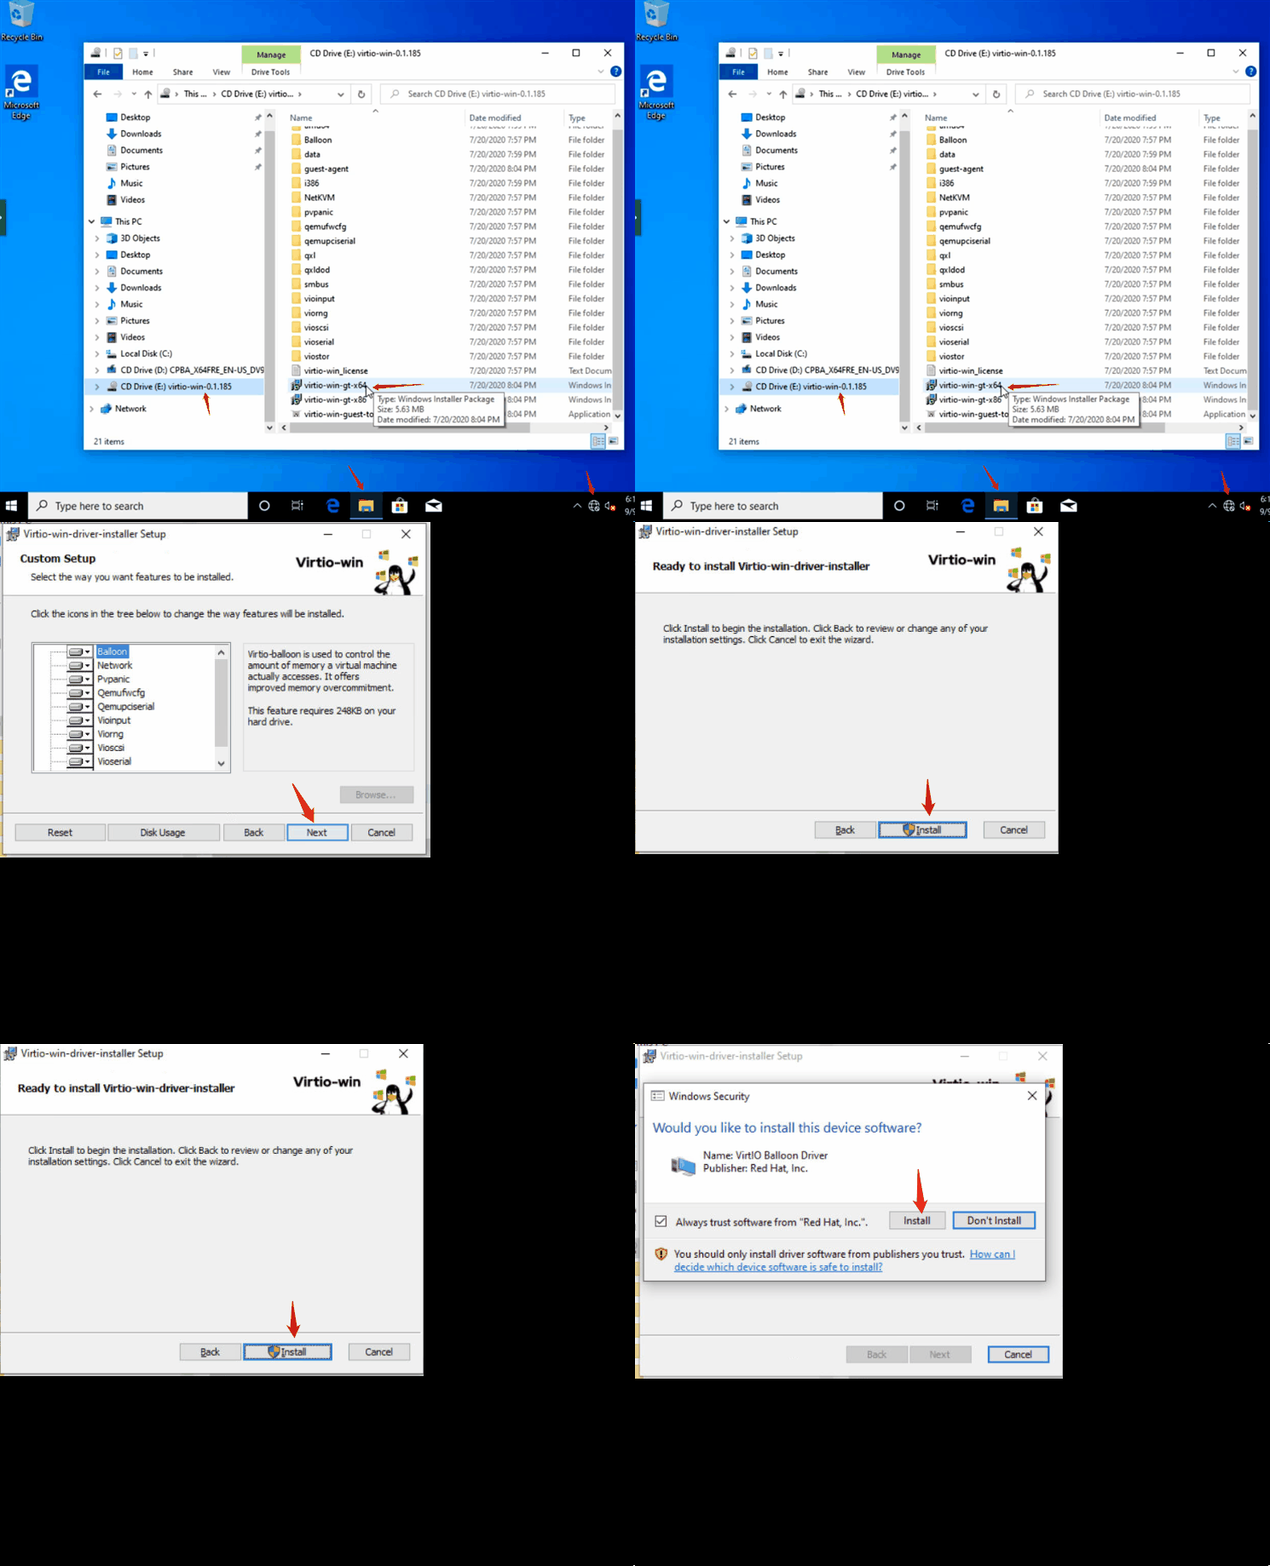
After the machine starts and you log in, open CD Drive E and run Virtio-win-guest-tools. This will install the virtio drivers along with spice vdagent and qemu guest agent. Follow the prompts (Next and OK) to complete the installation.
4. Disable Hibernate
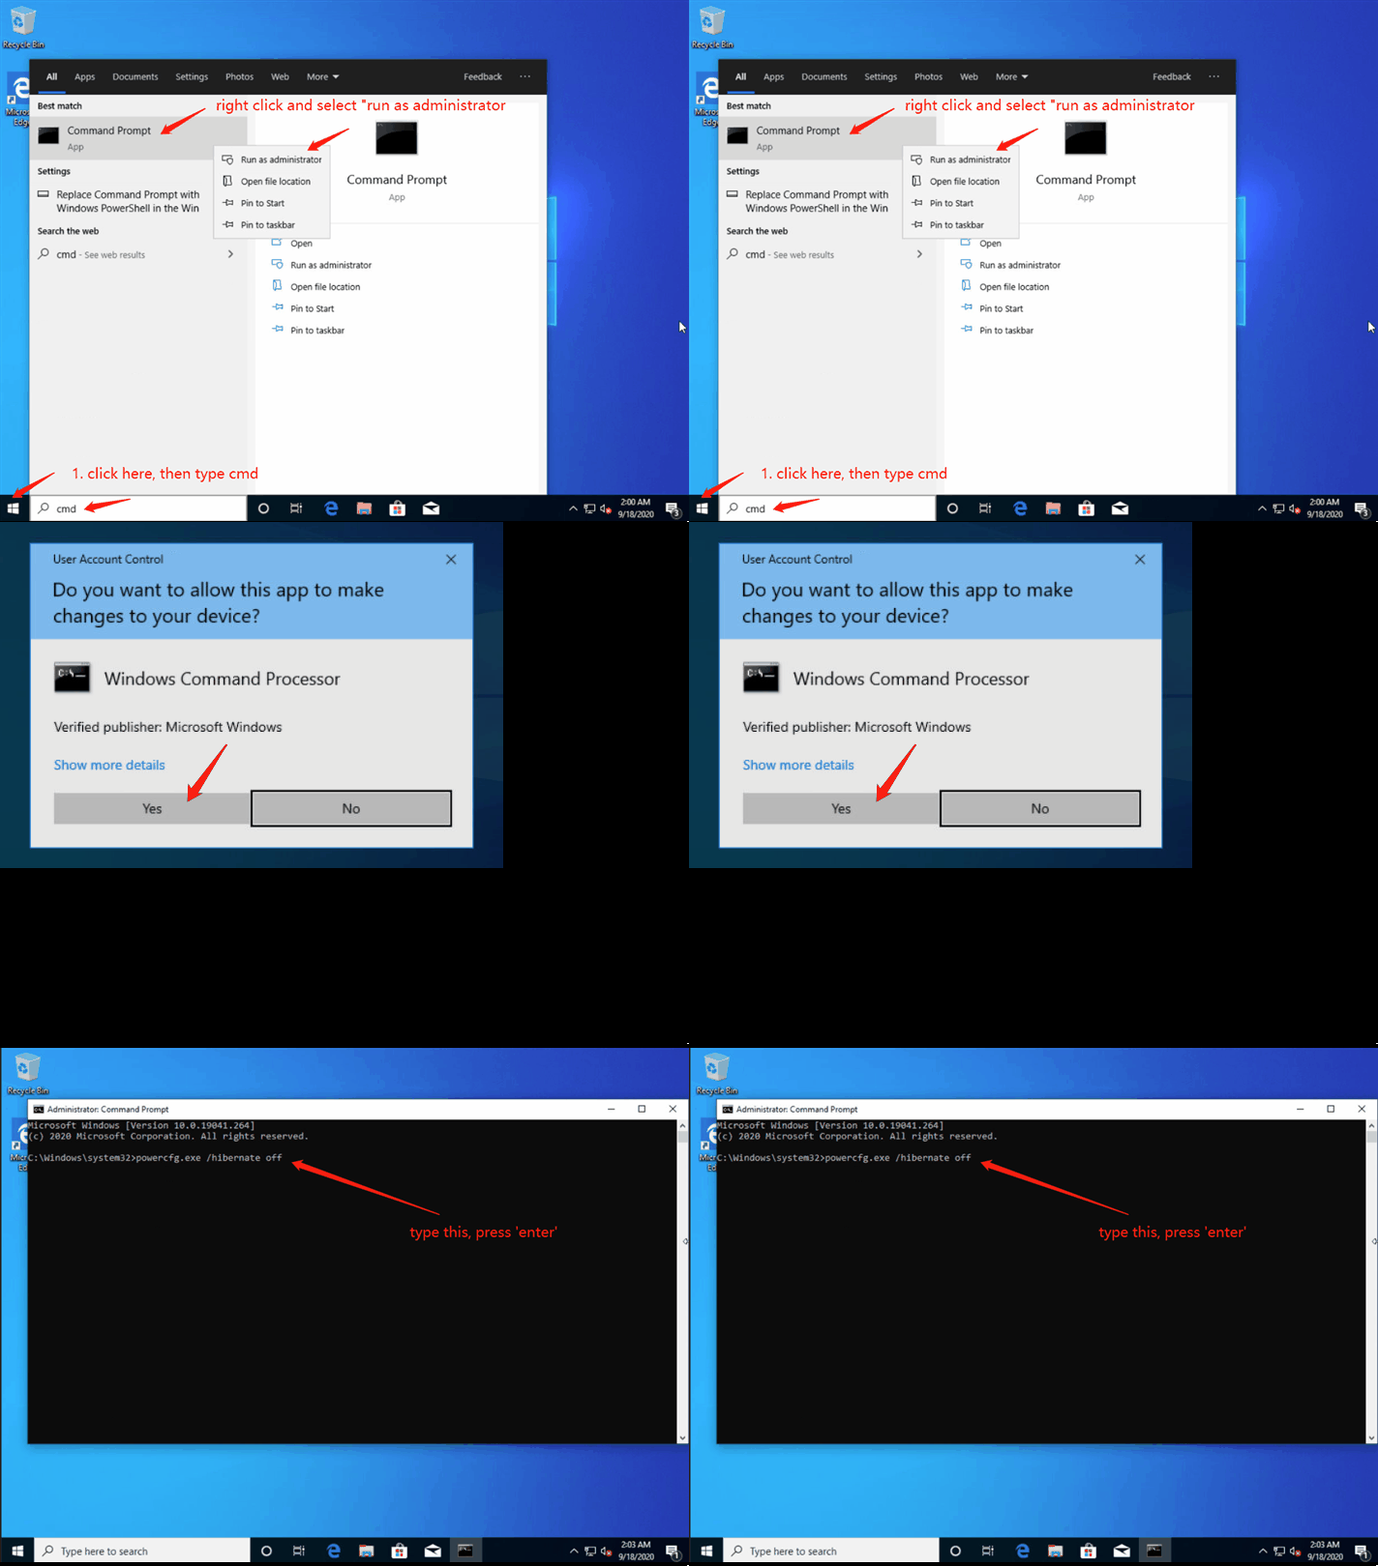
Right-click to open Command Prompt as an administrator, then type "powercfg.exe /hibernate off" and press Enter.
5. Enable Shutdown/Restart Windows 10 without Any Prompts
Open Registry Editor and go to this key: HKEY_USERS\.DEFAULT\Control Panel\Desktop.
Create a new String Value called AutoEndTasks and set its value to 1.
6. Check if the required service exists and set to "Automatic Start"
- Spice-Vdagent : for support of qemu vnc clipboard
- BalloonSerivce: for guest memory usage stats


7. Install and configure Tightvnc to allow proper VNC connection
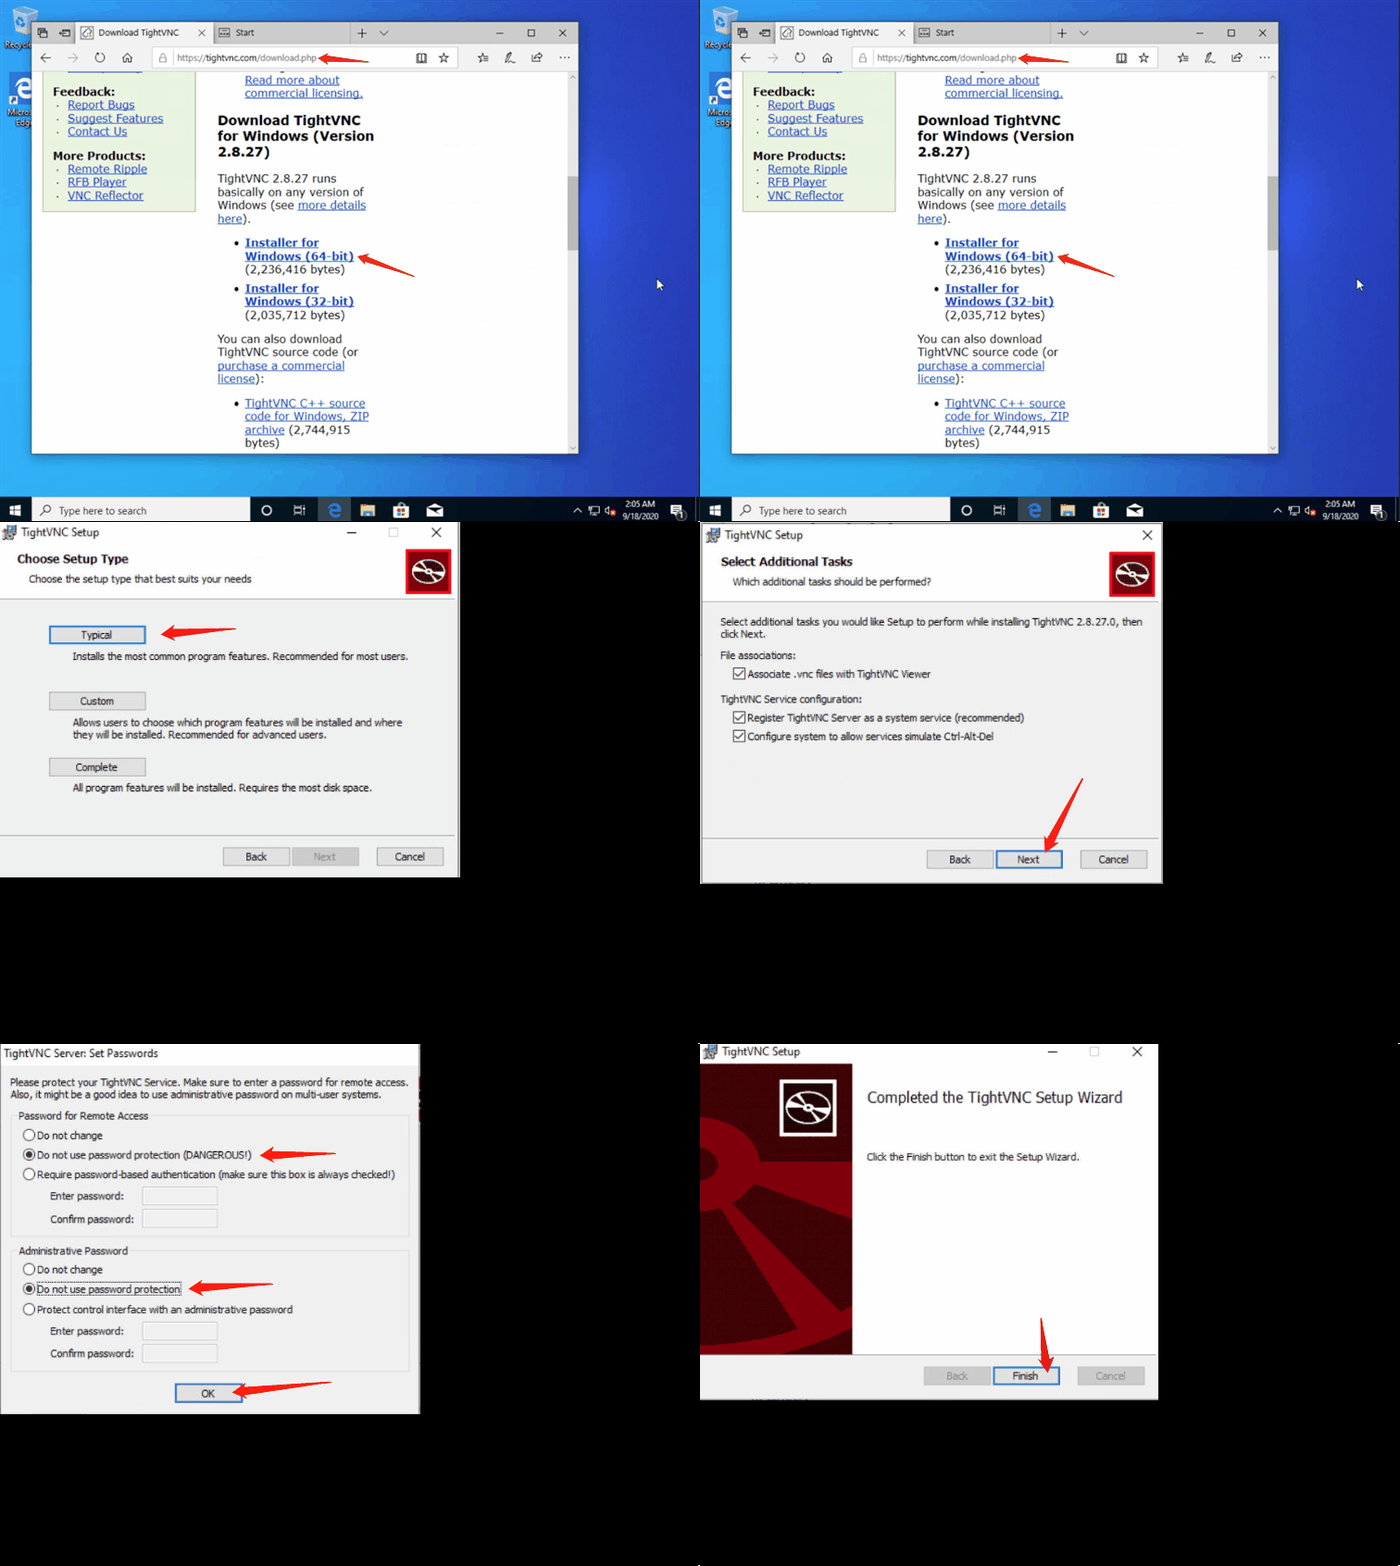
Visit https://www.tightvnc.com/download/ to get the TightVNC Windows installer.
Install the software and once it finishes, disable authentication.
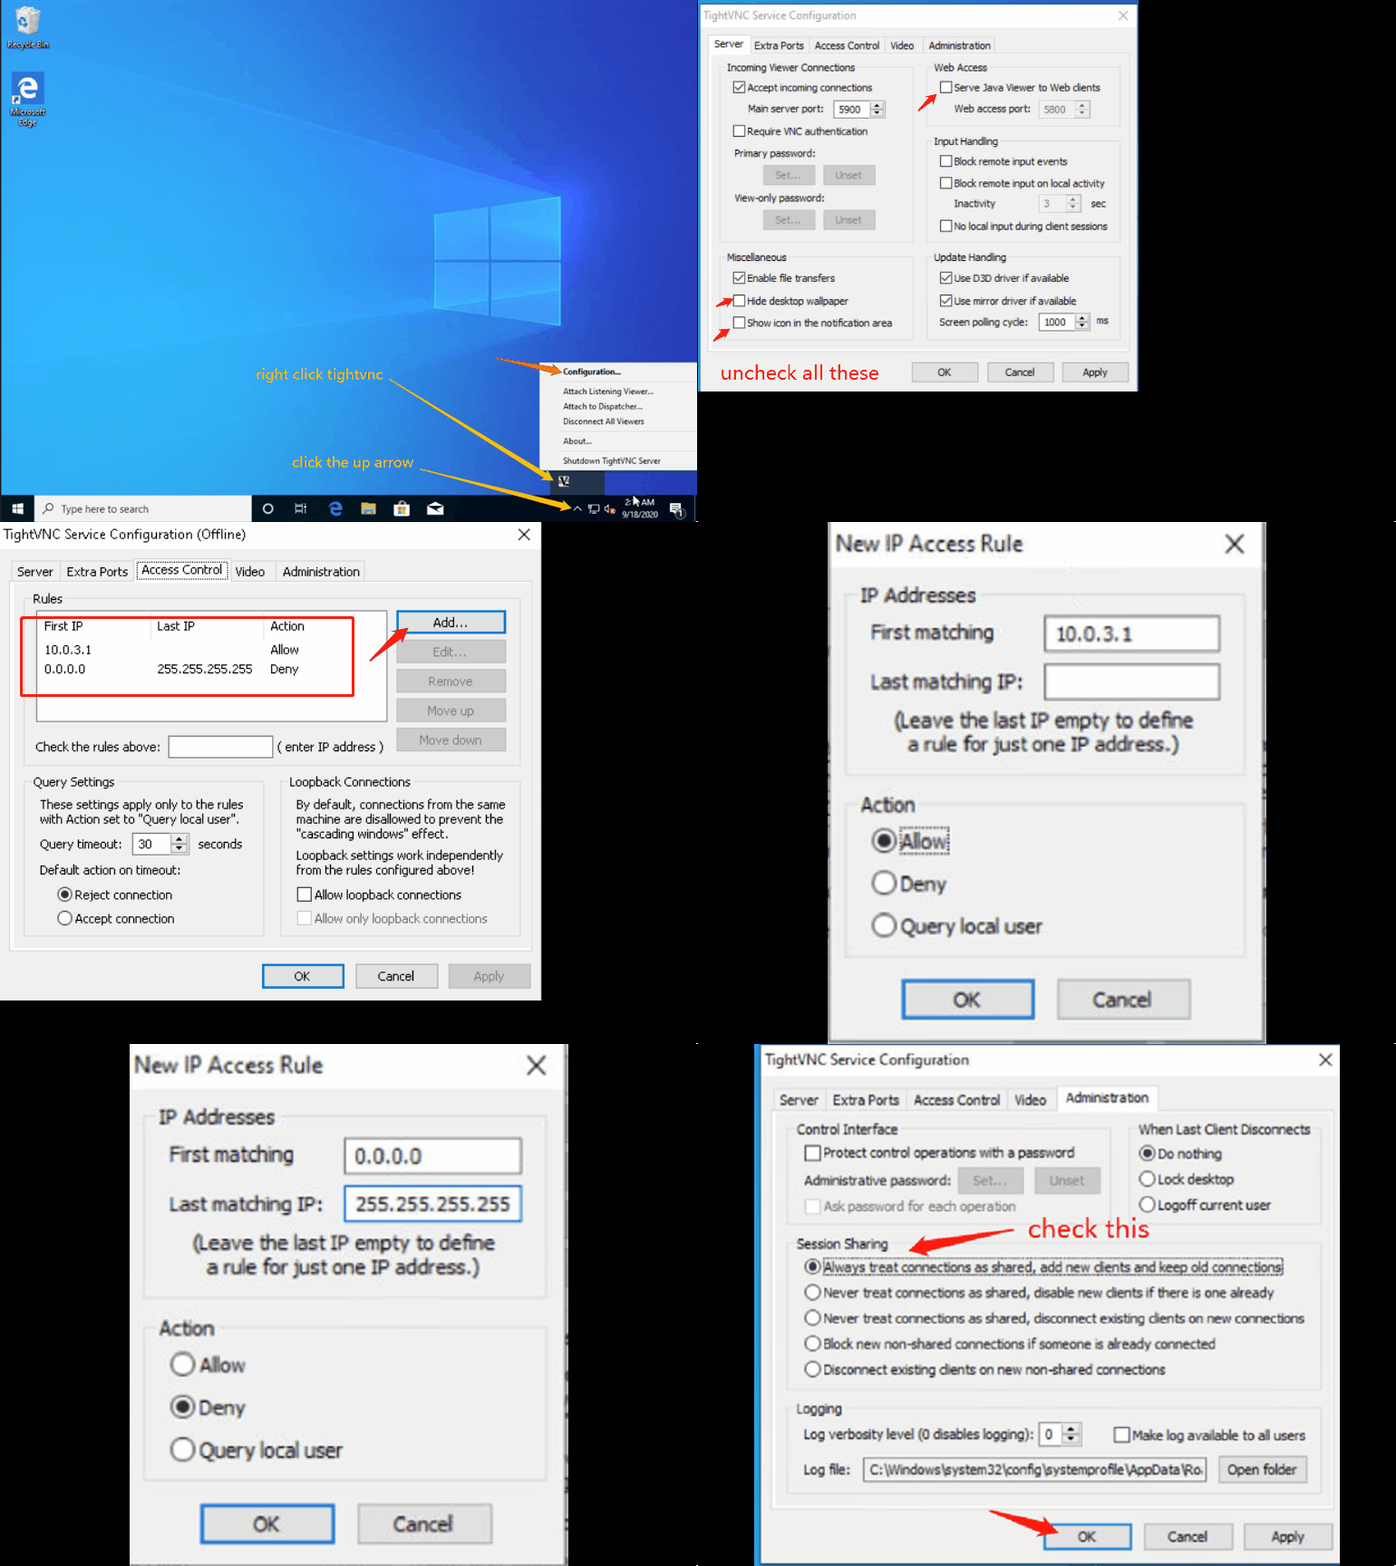
Launch the TightVNC service configuration tool and set it up.
8. Enable Shared-drive
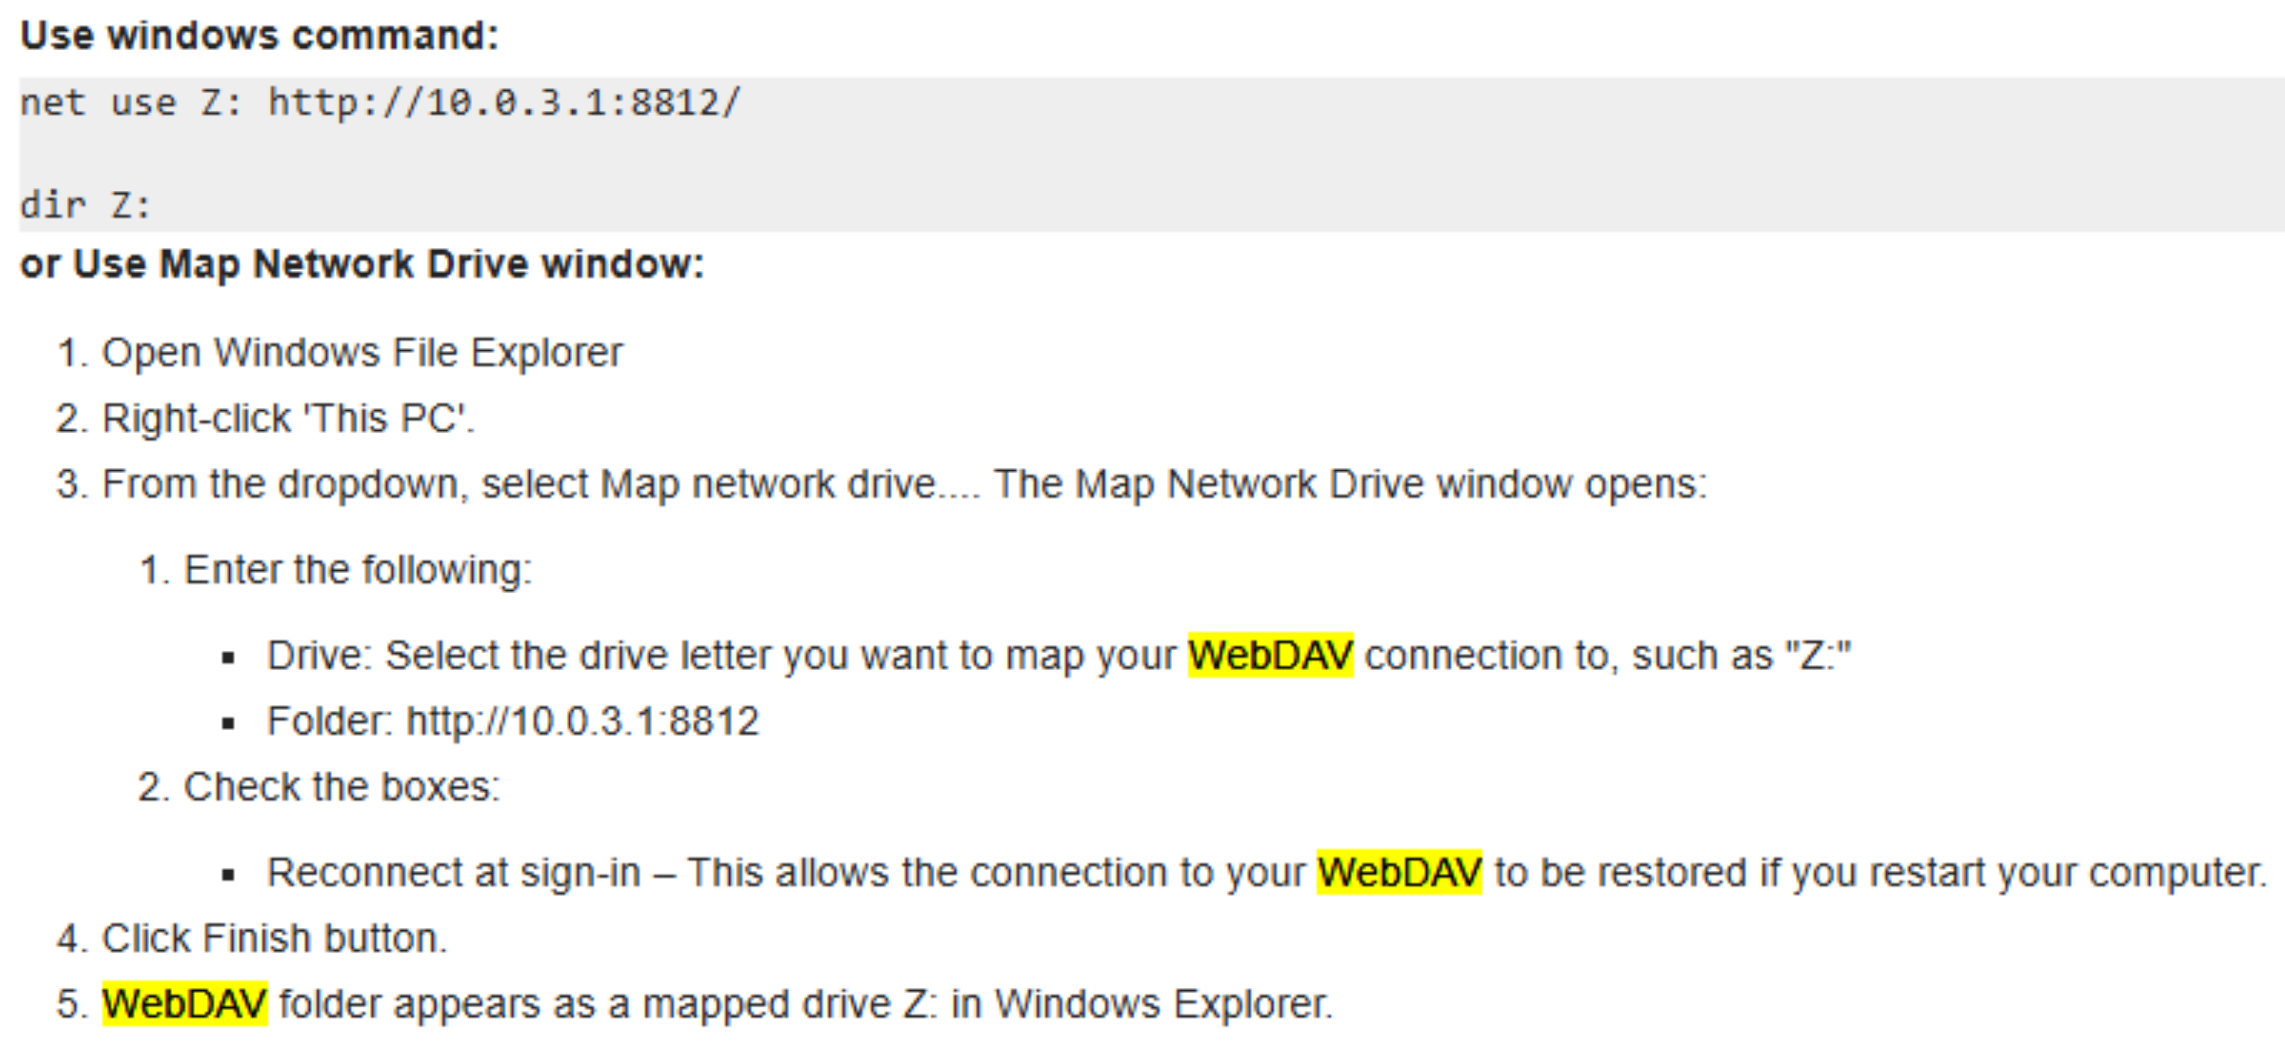
The Shared-drive feature enables file sharing between cloud desktops during a training course, or between your own PC and a cloud desktop. It relies on WebDAV technology. Before you can use it, you must map the drive. Refer to the screenshot below for guidance.
9. Shutdown your Windows properly
Click the Windows icon in the bottom-left corner, go to Power, and select Shutdown.
Please Note
If you need extra optional features, such as:
- DDWebdav for syncing trainer’s content folders to each participant’s machine,
- or DDUpload to easily upload files inside a DaDesktop machine,
please reach out to DaDesktop Tech Support.